
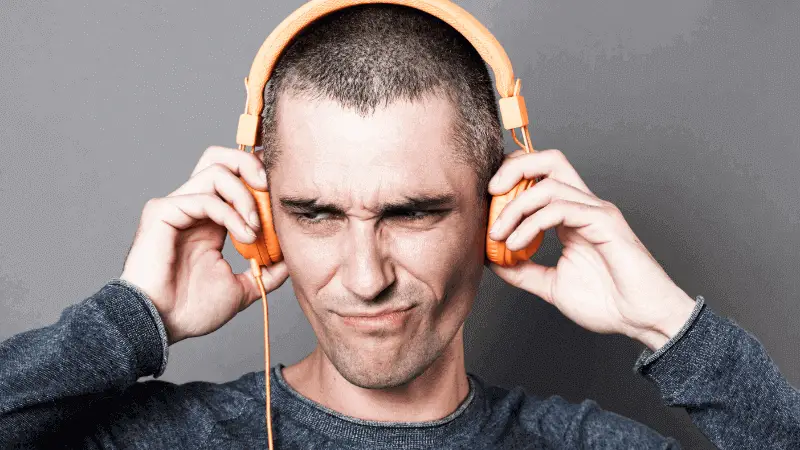
Whether it's listening to music or getting the weekly dose of your favorite TV series, good quality sounds coming through the headphones can either enhance or ruin the experience.
It can be frustrating when headphones start to produce static noise, interrupting your work and leisure.
So, why do you hear static in my headphones? The static noise in headphones usually happens due to loose wires, port issues, or poor equalization. If you don't inspect the wires, repair the plug, or clean the audio jack, you'll continue to suffer from such unbearable crackling sounds.
The good news is that, like most devices, there are ways for you to solve this problem. This is why we're sharing techniques on how you can diagnose the problem.
With step-by-step guides on how to fix static noise issues, you can return to being a staunch user of headphones for work and recreation.
Why Can You Hear Static Noise When Using Headphones?

There are several possible causes why headphones make irritating, crackling sounds. The most common include jack problems, loose wires, poor EQ, and interferences.
However, sometimes it's not easy to pinpoint the source, which is why we're going to teach you how to determine the reason, and consequently, apply the appropriate solution.
1: Auxiliary Port Issues
The most common cause of static noise in headphones is a defective auxiliary port, which is also known as the headphone jack.
The easiest way to determine if this is the problem is by plugging your headphones into several various AUX ports to know if the crackling continues.
In some cases, it's a matter of not plugging in the headphone jack altogether.
A partially plugged-in pair of headphones means poor electrical connection, which results in static noise.
2: Loose Wires

Headphones usually feature very thin layers of rubber covering thin conductive wires.
These wires allow the movement of electronic signals to and from the speakers.
It's easy to bend the casing because of the material, especially if you tend to loop it.
In effect, the wires lose the electronic signals, creating crackling noises at the same time.
3: Poor Equalization
There are cases wherein static noise results from the poor quality of the source material.
For example, a media player with bad equalization settings.
If the treble or bass settings are set too high, the volume can max out and make popping or cracking noises.
Aside from that, listening to anything at excessively high volumes can produce static noise if the headphones were not meant to emit sound levels at the high volumes you program.
4: Hardware Interference
Did you know that hardware interference can also produce static noise in headphones?
This is something you might not notice, but phones, printers, or other devices with electronic signals can sometimes cause interference, which then results in crackling sounds.
5: Broken Speakers
The worst-case scenario is a broken headphone speaker. This could be due to poor wiring or long-term wear and tear.
Sometimes, listening to high volumes or physical damage can also impact the quality of speakers.
6: Unclean Audio Jack

Look who's been secretly harboring debris all this time? Yes, you may not notice that the audio jack gets dirty each time you plug and unplug the headphones.
Sometimes, some of that dirt will remain in the wires. Unfortunately, such stains prohibit the devices from working properly.
Ways on How to Eliminate Static Noise in Headphones

Now that you've understood the possible causes of static noise, the next step is to cut it out altogether.
Here, we're going to dive into various options to resolve the issue and get the best quality sounds from your headphones.
1: Check the Hardware
The first troubleshooting option to consider is checking the hardware.
If you hear static noise after plugging the headphones' jack in a computer, try replugging it to a different device.
If the hissing sounds persist, then you may need to do some cleaning or replace the headphones. We'll discuss more of this later on.
Aside from that, you have to move away from a few home appliances.
Remember that other gadgets can produce interference, and sometimes, the easiest way to solve this is by avoiding those devices.
2: Inspect the Wires
There are times when our unconscious movements result in the loosening of wires.
For example, you're sitting in front of the computer while using your headphones for a meeting.
Suddenly, your pet zoomed in and hit something, causing your reflexes to take over and catch the item.
In the process, you've pulled the wires, creating a chance for static noise to come through.
You can easily solve this by tightening the wires. Also, do you know the old trick of blowing into the jack? Well, sometimes that works, too.
More often than not, we do not notice that corrosion or dirt gets stuck in the process of plugging and unplugging.
3: Substitute for Jacks

A computer typically contains several audio jacks. To reduce or cut static noise, it's advisable to pull out the wire from the one you are using. Then, insert it to a different point.
While this is a temporary solution, it works best if you don't have much time in your hands, and you need an immediate solution.
If the noise continues, then the issue is not with the port. Instead, there may be more significant damage to the headphones.
4: Turn the Volume Down
There are times when a simple move of turning the volume down can cut static noise. If the noise stops, maybe the volume was too loud for the headset to handle, to begin with.
It's also possible that the device's amplifier doesn't have enough power to drive the headset.
5: Repair the Plug
One of the most common problems with static noise on headphones is with the plug.
That's the part that goes into your computer, phone, or sound system. Hence, you tend to tug it the hardest.
Since the plug is where a lot of connections are made, it also becomes the weakest link when subjected to force and environmental elements.
Whenever you try to twist the plug in futile attempts to improve the sounds, sometimes you'll end up amplifying the static noise.
In this situation, what you need to do is to repair the plug. This one's a bit technical and requires you to show some handiness prowess.
If you have the time, skills, and equipment, soldering can help you repair the audio jack headphone connections.
6: Cut the Cable and Prepare the Wires
To see the cause of the problem, cut the cable about an inch from the connection to the plug. Use a pair of snips to remove an inch of the wire's outer jacket.
Normally, there are three internal wires: one for the left ear, another for the right ear, and a ground.
You should see two ground wires that you can join through soldering later on. Make sure to twist the two ground wires together.
Tin the Wires
Turn on the soldering iron. Once it's fully hot, take a piece of solder and apply it to the ends of the wires.
Use a sponge to clean off the solder that builds up on the tip of the iron.
Solder the Wires to the Plug
Unscrew the casing from the plug and slip it on the wire. Locate the two contacts; one is short while the other is longer.
If the wires are rubber coated, the right signal wire might be red, the left signal wire is likely white, while the ground wire is black.
If the wires are insulated with enamel, the right signal wire is probably red-colored while the left signal wire is likely green.
Slip the tinned ends of the wires into the holds on the contacts of the plug. Solder the wires in place.
Perform a Test
After linking all three contacts, screw the casing onto the jack. To test them out, plug them into an audio source, and listen to something.
If the sounds are clearer, it means the soldering worked.
7: Correct the Playback Settings of a Computer
Another way to get rid of static noise in headphones is by checking and correcting the audio settings.
This one only applies to computers, but phones and music players usually also have audio settings you can tinker with.
Although, in general, resolving improper audio settings can help alleviate static sound problems.
If done properly, you can even prevent this from happening again.
All you have to do is simply follow these steps:
- Find the speaker icon on the Taskbar and right-click it.
- From the list of options, select Playback Devices from the content menu.
- From the Sound Settings dialog box, locate the headphones in the list of devices.
- Open the properties and locate its Levels Adjustment settings.
- Move the slider to Zero and click Apply.
- Find and click on the Enhancement Settings.
- Enable the Disable All Sound Effects checkbox.
- Confirm all your changes and click OK repeatedly until you exit from all the open dialog boxes.
8: Update the Sound Card Driver
Updating the driver automatically or manually can also help you get rid of static noise in headphones.
The first thing you should do is visit the manufacturer's website and check if there are any updated versions for the driver available.
If there is one, download it and install the updated version on your computer. However, you have to make sure that the drivers are designed for your sound card model.
Installing a driver not meant for your specific card may render the sound card unfunctional.
Furthermore, you must ensure that the sound card is in the port. It would also be best if you clean up dust around the card.
9: Install a New Sound Card
If updating doesn't eliminate the static noise in your headphones, then the next best thing to do is to install a new sound card.
Here are easy-to-follow steps to modify the sound card in your computer:
- Shut down the audio source, disconnect peripheral devices, and remove any power cord.
- Remove the screws of the soundcard frame.
- Open the motherboard slot and push the card gently.
- Recheck if the card is firmly fit.
- If you need to install a new one, line up the side with the metal contact points with the open motherboard slot. Push down on the card until it's securely nestled in the slot.
- Screw through the sound card bracket to secure the computer's frame.
- Close the computer case.
- Attach the cables, peripherals, and accessories.
10: Move Your Speakers
As you've discovered earlier, static noise could also be due to hardware interference.
If there are other electrical devices stationed near the audio source, there could be static noise.
The most practical solution is to move the speakers away from other devices until the interference goes away.
11: Upgrade Headphones

If an inspection doesn't do any good or it's too risky to try to repair the headphones by yourself, the next best thing to do is to upgrade to more advanced headphones.
We suggest opting for noise cancelling headphones because not only can this block external noises, but this can also ensure the absence of static noise.
Keep in mind that the listening experience depends on the audio quality of the headphones.
Sometimes, it's high time to replace your current pair after years of enduring force due to plugging or safekeeping.
Besides, new headphones come with advanced features that make them last longer, both in terms of quality and durability.
Cleaning and Maintenance
Finally, cleaning applies to both old and new headphones. Like in all other things, especially gadgets, maintenance is a cost-effective way to preserve quality.
The good news is that cleaning audio jacks is easy. Here are the steps you need to do:
- Make sure to turn off the device you're cleaning and unplug cords from the power supply.
- Take a cotton swab and moisten the tip with Isopropyl alcohol.
- Insert the tip of the swab into the headphone jack.
- Slowly twist it back and forth.
- Clean both the inside and outside of the jack.
- Repeat the cleaning process until the swab appears clean.
If you don't want to use alcohol and cotton swabs, another way is to buy a can of compressed air.
Air is least likely to damage the jacket since you won't insert anything inside the hole other than the air.
With compressed air, you only need to point the nozzle at the headphone jack.
Then, press the mechanism that will release the air. Two blasts of dispensed air should be enough to moisten debris inside the jack.
Wrapping Up
Headphones help you listen to audio and do your work without disturbance from external sources.
Although, sometimes, internal issues can cause distraction. When you start to hear static noise, there are a few possibilities as to why this is happening.
With the tips we've discussed, you have several solutions to fix the issue to let you obtain the best audio quality from headphones.
Jessica is a Acoustical Engineer, currently based in the San Francisco Bay Area in California. After graduating from her degree in Master of Engineering degree in Acoustics from Solent University in 2014, Jessica worked for a few companies before She will be blogging about her past and current experiences in the studio and sharing her journey as she pursues her career goals. She enjoy the balance of work inside and out of the office, solving practical problems on a daily basis as every project is different and requires a different solution, the variety of work (sound insulation testing, background noise survey, mechanical plant commissioning, external plant assessment, plant room breakout assessments) and the mix of independent and team work.